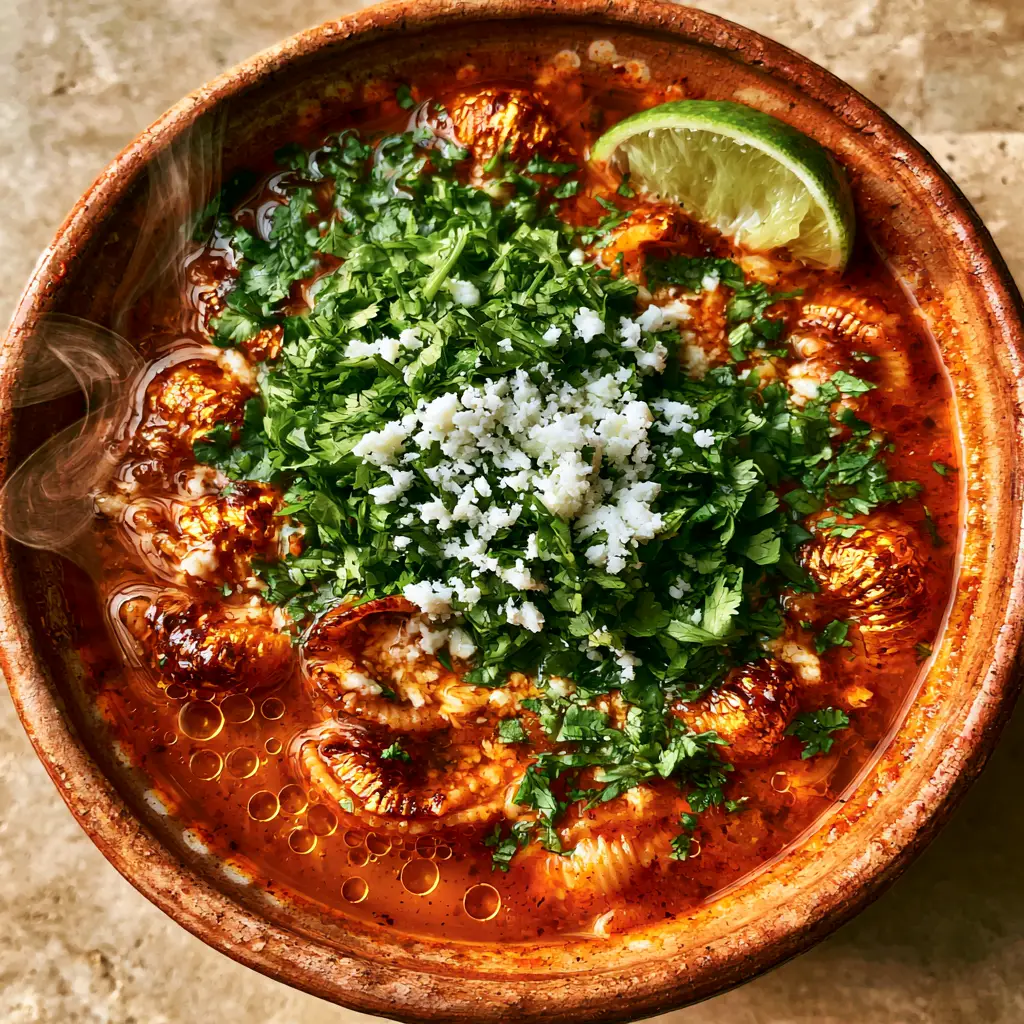
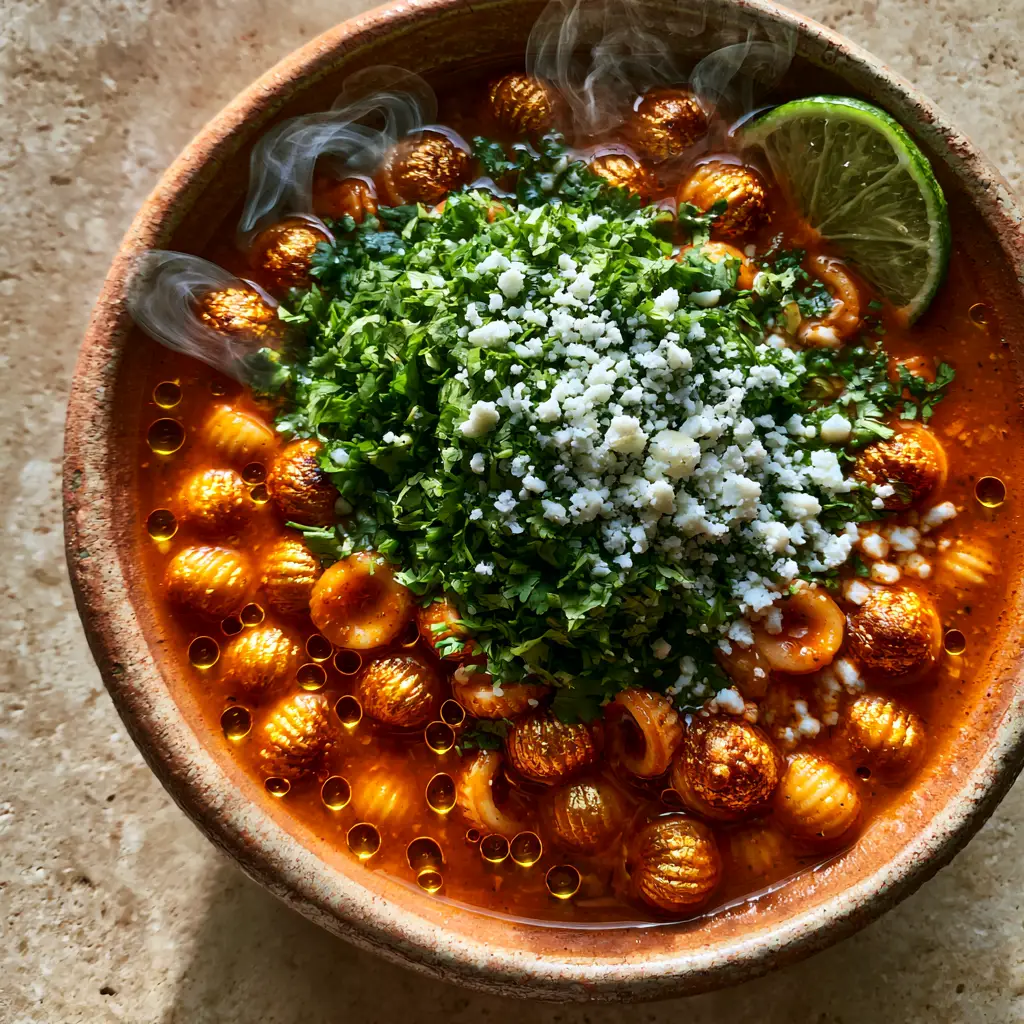
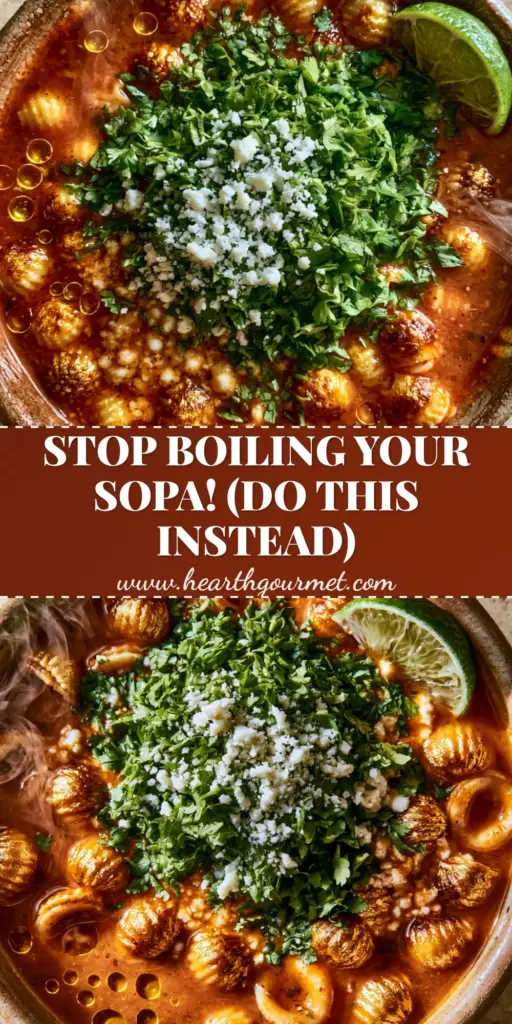
Sopa de Conchas is more than just a meal; it is a warm embrace in a bowl, a nostalgic staple of the Mexican kitchen that brings comfort to every generation. Imagine small, delicate pasta shells toasted to a shimmering golden-brown, submerged in a rich, velvety reddish-orange tomato and garlic broth that glints with tiny droplets of flavorful oil. This isn’t just soup; it’s a sensory journey through traditional home cooking.
The visual appeal of this dish is undeniable, especially when topped with a vibrant mountain of finely minced bright green cilantro and a snowy sprinkle of crumbled white queso fresco. As translucent wisps of steam rise from the liquid, the aroma of toasted grain and roasted garlic fills the air, signaling that dinner is served. Whether you grew up with this “sopa aguada” or are discovering its magic for the first time, this recipe captures the authentic texture and depth of flavor found in the best Mexican households.
To achieve the professional result seen in our photography, we focus on the “sofrito” method—frying the pasta and the tomato base to develop complex sugars. This process ensures the broth remains thick and savory rather than watery. Ready to master this classic? Let’s dive into the science of the perfect shell soup.
Why This Authentic Sopa de Conchas Works
- The Maillard Transformation: By toasting the dry pasta shells in oil before adding liquid, we create a nutty, toasted flavor profile that prevents the pasta from becoming mushy.
- Velvety Texture: A fresh-blended tomato and garlic base, fried until concentrated, provides a rich mouthfeel and that signature reddish-orange hue.
- Perfect Flavor Balance: The acidity of the lime wedge cuts through the savory chicken broth, while the queso fresco adds a creamy, salty finish.
- Visual Contrast: The bright green cilantro against the deep orange broth makes this dish as beautiful to look at as it is to eat.
The Anatomy of a Perfect Mexican Shell Soup
Creating an elite Sopa de Conchas requires a balance of pantry staples and fresh aromatics. Each ingredient plays a structural or flavor-enhancing role to ensure the final dish matches the professional visual blueprint.
7 oz (200g) Small Pasta Shells (Conchas): These are the star of the show; look for “conchitas” or small shells that will capture the broth inside their curves. The size is critical for the “shimmering golden” look we want to achieve during the toasting phase.
3 Large Roma Tomatoes (approx. 300g): Fresh tomatoes provide the base acidity and color. We blend these raw to create a smooth, velvety puree that transforms into a deep orange broth when fried.
2 cloves Garlic (10g): Essential for the aromatic backbone of the soup. Garlic is blended directly with the tomatoes to ensure its flavor is evenly distributed throughout the liquid.
1/4 White Onion (50g): This adds a subtle sweetness and depth to the tomato base. It should be peeled and chopped roughly before heading into the blender.
6 cups (1.4L) High-Quality Chicken Broth: While water and bouillon are traditional, using a rich chicken stock provides a more luxurious mouthfeel and better nutritional profile. If you’re a fan of soup-based meals, you might also enjoy our Italian chicken soup for a different flavor profile.
2 tbsp (30ml) Neutral Frying Oil: Such as vegetable or grapeseed oil. This is a “foundational invisible ingredient” required to toast the pasta to a deep golden-brown and to bloom the tomato puree.
1/2 cup (15g) Fresh Cilantro: Finely chopped, this provides the bright green visual contrast and a burst of herbaceous flavor. It must be fresh, never dried.
1/4 cup (40g) Crumbled Queso Fresco: This mild, snowy white cheese provides the perfect salty accent. If you can’t find it, a mild feta or Cotija is a suitable substitution.
1 Fresh Lime: Sliced into wedges. The juice is added at the table to brighten the entire flavor profile of the soup.
Essential Tools for Culinary Success
To achieve the “handheld smartphone photo” quality of this dish, you need the right tools to manage heat and texture. A heavy-bottomed pot or Dutch oven is preferred for even heat distribution during the pasta toasting phase.
You will also need a high-speed blender to ensure the tomato and garlic base is completely smooth, avoiding any unwanted chunks in the velvety broth. A fine-mesh sieve is optional but recommended if you prefer a perfectly refined liquid. For those who take their soup on the go, consider using an electric lunch box or a portable lunch warner to keep the conchas at the ideal temperature without overcooking the pasta.
Step-By-Step Instructions for the Perfect Sopa
1. Crafting the Aromatic Tomato Base
Start by placing your Romas, onion, and garlic in the blender. Add 1/2 cup (120ml) of your chicken broth to help the blades catch. Blend on high until the mixture is a completely smooth, pale pink liquid. This step is vital for the “velvety” description in our visual blueprint.
2. The Art of the Golden Toast
Heat the oil in your pot over medium heat. Add the dry pasta shells. Stir constantly for 3-5 minutes. Look for a sensory cue: the pasta will turn from a dull beige to a shimmering, deep golden-brown and smell like toasted popcorn. Do not walk away; the transition from golden to burnt happens in seconds.
3. Frying the Puree (The Flavor Secret)
Pour the blended tomato mixture directly into the hot pot with the toasted shells. It will sizzle and steam aggressively—this is exactly what you want. Cook this mixture for 2-3 minutes, stirring constantly, until the color shifts from pink to a vibrant reddish-orange. This “frying” of the sauce creates those tiny droplets of oil on the surface mentioned in the Midjourney prompt.
4. The Simmer and Expansion
Add the remaining 5.5 cups (1.3L) of chicken broth and a pinch of salt. Bring to a boil, then reduce heat to low and cover. Simmer for 8-10 minutes. Watch for the visual change: the shells should be tender but still hold their shape, submerged in a rich, thickened broth.
5. Final Garnish and Presentation
Ladle the steaming soup into rustic ceramic bowls. Top with a “mountain” of finely chopped cilantro and a generous sprinkle of queso fresco. Place a fresh lime wedge on the rim. The contrast of the snowy cheese against the reddish-orange broth is the hallmark of an elite Sopa de Conchas.
Expert Tips for Recipe Perfection
- Prevent Over-Absorption: Pasta continues to soak up liquid as it sits. If you aren’t serving immediately, cook the pasta for 2 minutes less than directed and add extra broth when reheating.
- Salt Awareness: If using store-bought bouillon, taste the broth before adding extra salt. The queso fresco also adds salinity.
- Texture Control: For an even thicker broth, blend a small handful of the toasted pasta shells with the tomato mixture. This releases extra starch into the liquid.
- Heat Management: If the pasta is browning too quickly, remove the pot from the heat for 30 seconds while stirring to bring the temperature down.
Creative Pairings and Serving Suggestions
This soup is often served as a “first course,” but it makes a fantastic light lunch or dinner when paired correctly. For a full Tex-Mex spread, consider serving it alongside chicken chimichangas or a hearty chicken torta sandwich.
If you are looking for more pasta-based inspiration, our elote pasta salad uses similar Mexican flavor profiles in a cold format. For a heartier dinner, Sopa de Conchas acts as a wonderful starter for enchilada recipes or even a classic easy pizza recipe for a fusion-style family night.
Preserving Your Sopa de Conchas
Refrigeration: Store leftovers in an airtight container for up to 3 days. Note that the pasta will swell and the soup will thicken into a stew-like consistency. Simply add a splash of water or broth when reheating.
Freezing: We do not recommend freezing Sopa de Conchas, as the pasta shells lose their structural integrity and become grainy upon thawing.
Reheating: Use the stovetop over medium-low heat. Avoid the microwave if possible to prevent the pasta from exploding or becoming rubbery.
Frequently Asked Questions
Yes, you can substitute with 8oz of canned tomato sauce, but the flavor will be less vibrant and the texture may not be as velvety as the fresh-blended version.
If not serving immediately, store the broth and cooked pasta separately, or simply add 1-2 cups of extra broth when reheating to restore the soup consistency.
Traditionally, it is a ‘sopa aguada’ (watery soup), but the starch from the toasted pasta and the fried tomato base should give it a slightly rich, velvety body.
A mild feta is the closest substitute for texture and saltiness, though Cotija or even a mild goat cheese can work in a pinch.
Toasting the shells in oil creates a nutty flavor and a protective barrier that prevents the pasta from becoming too soft and mushy in the hot broth.
Authentic Sopa de Conchas Recipe Card
Sopa de Conchas: The Ultimate Mexican Shell Soup Recipe
Ingredients
Equipment
Method
- Place tomatoes, onion, garlic, and 1/2 cup (120ml) chicken broth in a blender. Process until completely smooth and velvety.
- Heat oil in a large pot over medium heat. Add dry shells and stir constantly until shimmering golden-brown and fragrant.
- Pour the tomato puree into the pot with toasted shells. Cook for 2-3 minutes until the color deepens to a rich reddish-orange.
- Add remaining broth. Bring to a boil, then cover and simmer on low for 8-10 minutes until pasta is tender.
- Ladle into bowls and top with finely chopped cilantro, crumbled queso fresco, and a fresh lime wedge.
Notes
If reheating, add a splash of broth to loosen the consistency.
Share the Comfort of Sopa de Conchas
There is nothing quite like a bowl of Sopa de Conchas to turn a gray day into a warm memory. The combination of toasted pasta, garlic-rich broth, and fresh toppings is a testament to the power of simple ingredients treated with care. We hope this recipe becomes a staple in your home!
If you enjoyed this guide, please leave a comment below and let us know how your toasted shells turned out! Don’t forget to save this recipe to your favorite boards on Pinterest so you can find it whenever the craving for comfort hits.