Mastering soup to can recipes is the ultimate culinary “level up” for any home cook looking to marry convenience with gourmet quality. Imagine opening your pantry to find gleaming glass jars filled with tender seared beef, vibrant heirloom carrots, and earthy pearl barley, all suspended in a rich, amber bone broth. This isn’t just meal prep; it is artisanal food preservation that captures the peak of seasonal freshness.
The beauty of this specific recipe lies in the “vertical layering” technique, which ensures every jar is a perfectly balanced meal. By following professional canning standards, you transform raw, vibrant ingredients into a shelf-stable masterpiece that looks as beautiful on your shelf as it tastes in the bowl. Whether you are a seasoned survivalist or a busy professional, these soup to can recipes provide a soul-warming solution for those nights when you simply don’t have time to cook from scratch.
Why This Preserved Beef and Barley Soup Stands Above the Rest
- Unrivaled Texture: Unlike mushy store-bought versions, our method of searing the beef cubes first ensures a robust, “steak-like” bite even after the canning process.
- Gourmet Visuals: The use of heirloom carrots provides a rainbow of colors that look stunning behind glass, complemented by the dark green ribbons of kale.
- Rich Umami Depth: A foundational amber bone broth, seasoned with cracked peppercorns and fresh rosemary, creates a glossy, restaurant-quality liquid gold.
- Pantry Independence: This recipe is designed for long-term storage, giving you a healthy, homemade alternative to high-sodium commercial cans.
The Building Blocks of a Shelf-Stable Masterpiece
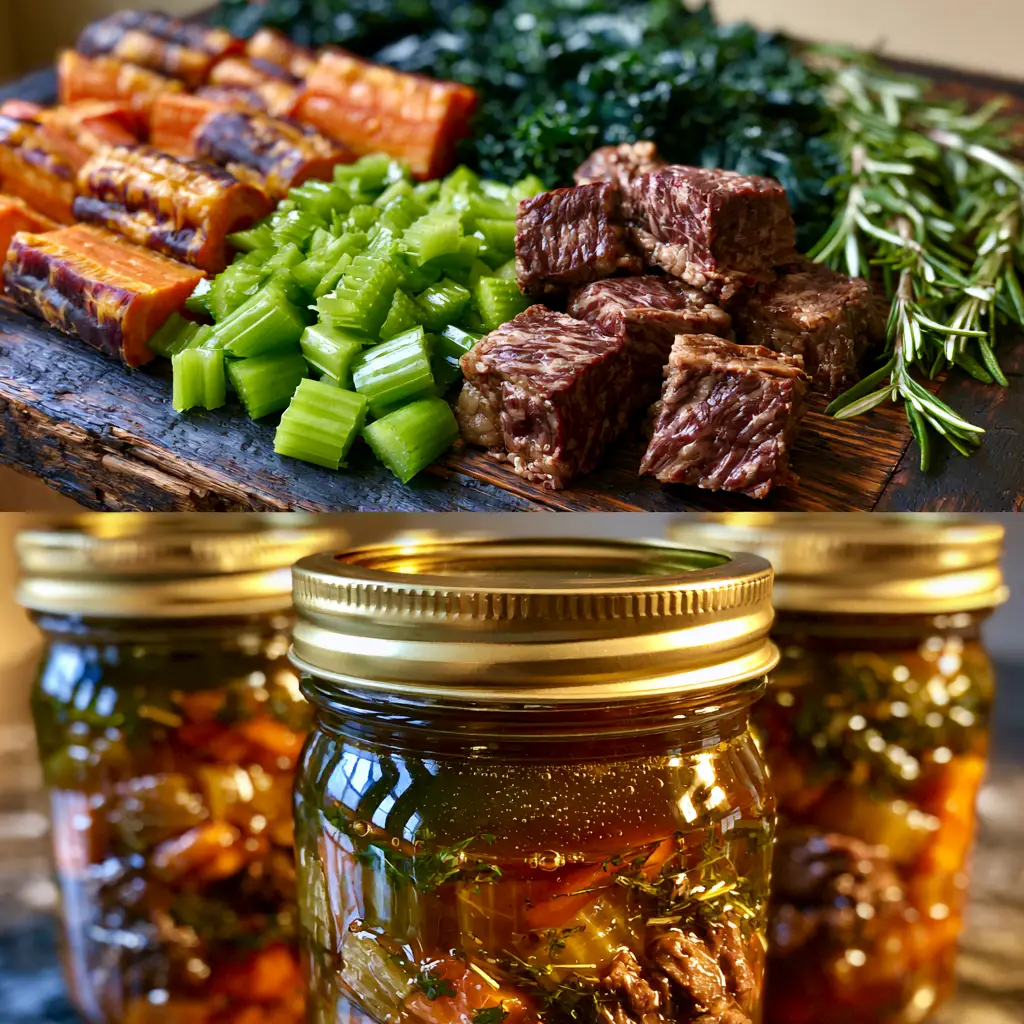
Cubes of Seared Marbled Beef: We use 2 lbs (900g) of chuck roast, cut into 1-inch pieces. Searing them in a hot pan creates the Maillard reaction, ensuring a deep brown color and complex flavor profile.
Vibrant Heirloom Carrots: 3 cups (450g) of thick-cut carrots provide a natural sweetness. Using heirloom varieties adds purples and yellows that elevate the visual “wow” factor in the jar.
Chopped Bright Green Celery: 2 cups (200g) of celery stalks add a necessary aromatic base. The crisp green color stays suspended in the broth, providing a fresh aesthetic.
Sliced Red Potatoes: 2 cups (300g) of waxy red potatoes hold their shape perfectly during high-pressure processing. Unlike starchy russets, these won’t break down into the broth.
Nutty Pearl Barley: 1 cup (200g) of pearl barley adds a chewy, satisfying grain element. It absorbs the beef juices while remaining distinct in the jar.
Dark Leafy Kale: 2 cups (130g) of chopped kale provide a hit of bitterness and nutrition. Its dark pigment offers a beautiful contrast against the amber broth.
Foundational Aromatics: Fresh rosemary sprigs, bay leaves, and 1 tbsp (10g) of cracked black peppercorns provide the high-note seasonings. These “suspended herbs” are what make the finished jars look like a professional photograph.
Rich Amber Bone Broth: 8 cups (1.9L) of high-quality beef bone broth serves as the medium. This provides the “glossy” finish seen in high-end soup to can recipes.
Essential Tools for Safe Preservation
To successfully execute these soup to can recipes, you will need a professional-grade Pressure Canner. Because beef and vegetables are low-acid foods, a simple water bath is not safe; pressure is required to eliminate spoilage bacteria. You will also need quart-sized Mason jars with gold-toned lids for that classic, rustic look, and a wide-mouth funnel to keep the jar rims clean for a perfect seal.
Step-by-Step: Crafting the Perfect Canned Soup
Developing the Flavor Base (The Sear)
Heat 2 tbsp (30ml) of high-smoke point oil in a heavy cast-iron skillet over medium-high heat. Working in batches, sear the beef cubes until a deep, dark-brown crust forms on all sides. Do not overcrowd the pan, as this causes the meat to steam rather than sear. Remove the meat and set aside, but keep those flavorful browned bits (fond) in the pan.
Prepping the Vibrant Vegetable Medley
Wash and chop your heirloom carrots into thick rounds and your celery into uniform 1/2-inch pieces. Slice the red potatoes into 1/4-inch rounds, leaving the skin on for color and texture. In a large bowl, toss the carrots, celery, and potatoes together. This ensures an even distribution when you begin filling your jars.
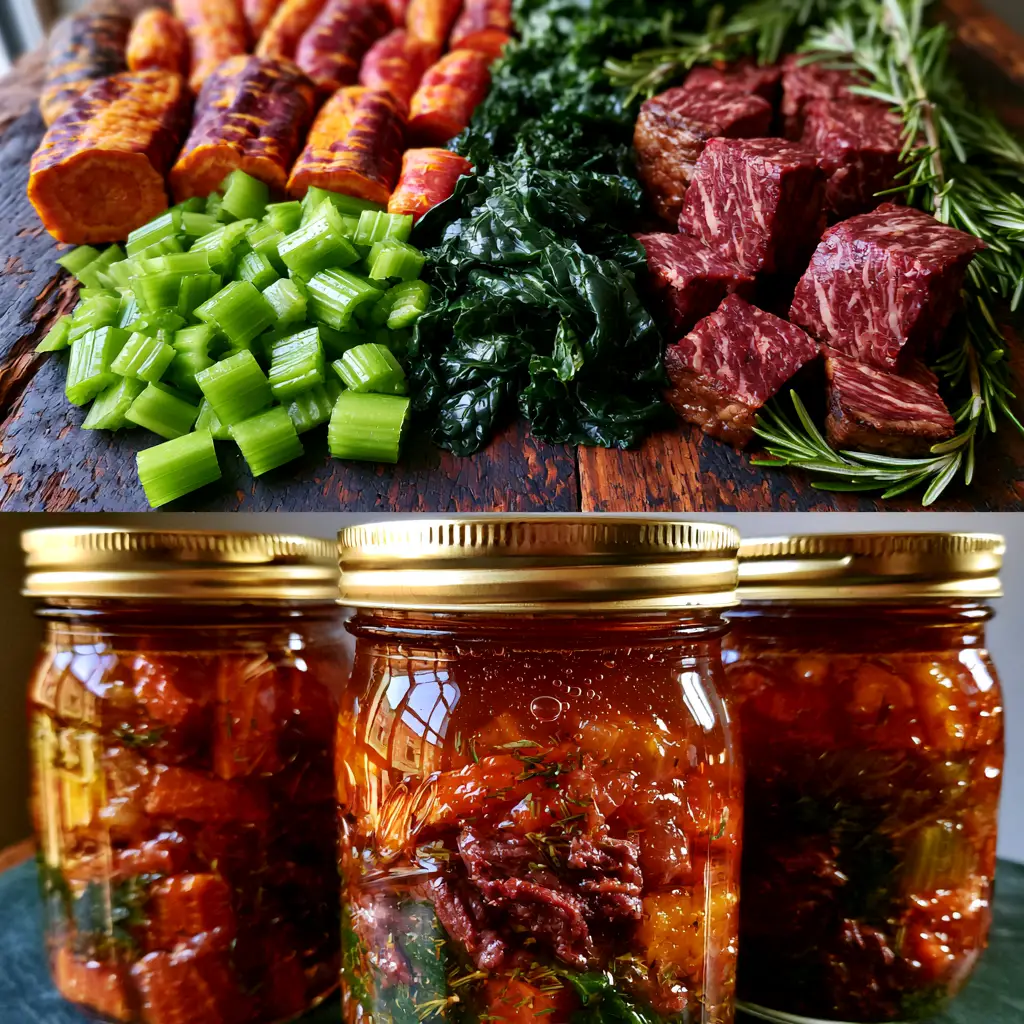
Layering for Visual Excellence
In each sterilized Mason jar, begin by placing a handful of the seared beef cubes at the bottom. Follow with a layer of the mixed vegetables, a tablespoon of pearl barley, and a few ribbons of dark kale. Nestle a fresh rosemary sprig and one bay leaf against the glass so they are visible from the outside. This layering technique is what gives soup to can recipes their artisanal, “hand-packed” appearance.
The Final Pour and Seal
Bring your amber bone broth to a simmer and stir in the cracked black peppercorns. Use a funnel to pour the hot broth over the ingredients in the jar, leaving exactly 1 inch (2.5cm) of headspace at the top. Use a bubble remover tool to release any trapped air; you should see tiny bubbles rising to the surface. Wipe the rims with a clean, damp cloth, place the gold lids on top, and screw the bands to finger-tight.
The Pressure Canning Process
Place the jars into your pressure canner with the required amount of water. Process the jars at 11 pounds of pressure (adjust for altitude) for 90 minutes for quarts or 75 minutes for pints. Once the time is up, allow the pressure to drop naturally. When you remove the jars, the broth should be glossy and bubbling, with the herbs perfectly suspended in the rich liquid.
Expert Secrets for the Best Soup to Can Recipes
- Check Your Barley: Always use pearl barley rather than hulled barley for canning, as it behaves more predictably under high pressure and doesn’t cloud the broth as much.
- Fat Management: Trim excess fat from the beef before searing. Too much rendered fat can interfere with the jar’s seal during the canning process.
- The Headspace Rule: Never skimp on the 1-inch headspace. As the barley and vegetables expand, they need that room to prevent the contents from siphoning out of the lid.
- Salt Strategy: Use canning salt or sea salt rather than table salt. Table salt contains anti-caking agents that can make your amber broth look cloudy or “muddy.”
Optimal Storage and Serving Suggestions
Store your finished jars in a cool, dark, and dry place. For the best flavor and texture, consume your soup to can recipes within 12 to 18 months. When you are ready to eat, simply pour the contents into a saucepan and simmer for 5-10 minutes. This soup is hearty enough to stand alone, but it pairs beautifully with a side of buttery melting cabbage or a bowl of ditalini pasta if you want to stretch the meal further.
If you enjoy the earthy profile of this beef stew, you might also love our Lentil and Rice Soup or our vibrant Carrot and Lentil Soup, both of which offer fantastic plant-based alternatives for your pantry shelves.
Frequently Asked Questions
Yes, you can use venison or lamb cubes following the same searing method. The processing time remains the same for all meat-based soup to can recipes in quart jars.
No. Because beef and vegetables are low-acid foods, they must be processed in a pressure canner to reach the temperatures necessary to prevent botulism. Water bath canning is not safe for meat-based soups.
No, you only need to sear the outside of the beef cubes to develop flavor and color. The high heat and pressure inside the canner will fully cook the meat during the 90-minute processing time.
When stored in a cool, dark place, these jars will maintain peak quality for 12-18 months. Always check that the vacuum seal is intact before opening.
Barley expands significantly during the high-pressure canning process. To prevent this, ensure you only use 1/4 cup of pearl barley per quart jar and maintain the full 1-inch headspace.
The Ultimate Beef and Barley Preservation Recipe
Soup to Can Recipes: Hearty Beef and Heirloom Barley Jarred Stew
Ingredients
Equipment
Method
- Heat oil in a heavy skillet and sear beef cubes until a deep golden-brown crust forms on all sides. Set aside.
- Chop heirloom carrots, celery, and potatoes into uniform, thick pieces. Chop kale into ribbons.
- Layer beef, vegetables, 1/4 cup barley per jar, and kale into sterilized quart jars. Tuck a rosemary sprig and bay leaf against the glass.
- Pour hot bone broth and peppercorns into jars, leaving 1 inch of headspace. Remove bubbles and wipe rims.
- Process in a pressure canner at 11 lbs of pressure for 90 minutes. Allow pressure to drop naturally before opening.
Notes
Leave exactly 1 inch of headspace to allow for barley expansion.
Join the Home Preservation Movement!
Mastering soup to can recipes is a gift to your future self. There is no greater feeling of security and satisfaction than seeing a pantry stocked with homemade, nutrient-dense meals ready at a moment’s notice. We invite you to share your canning success stories in the comments below! Don’t forget to follow us on Pinterest for more visual recipe blueprints and preservation guides. If you loved this recipe, please share it with your fellow home cooks and help us grow our community of gourmet preppers!