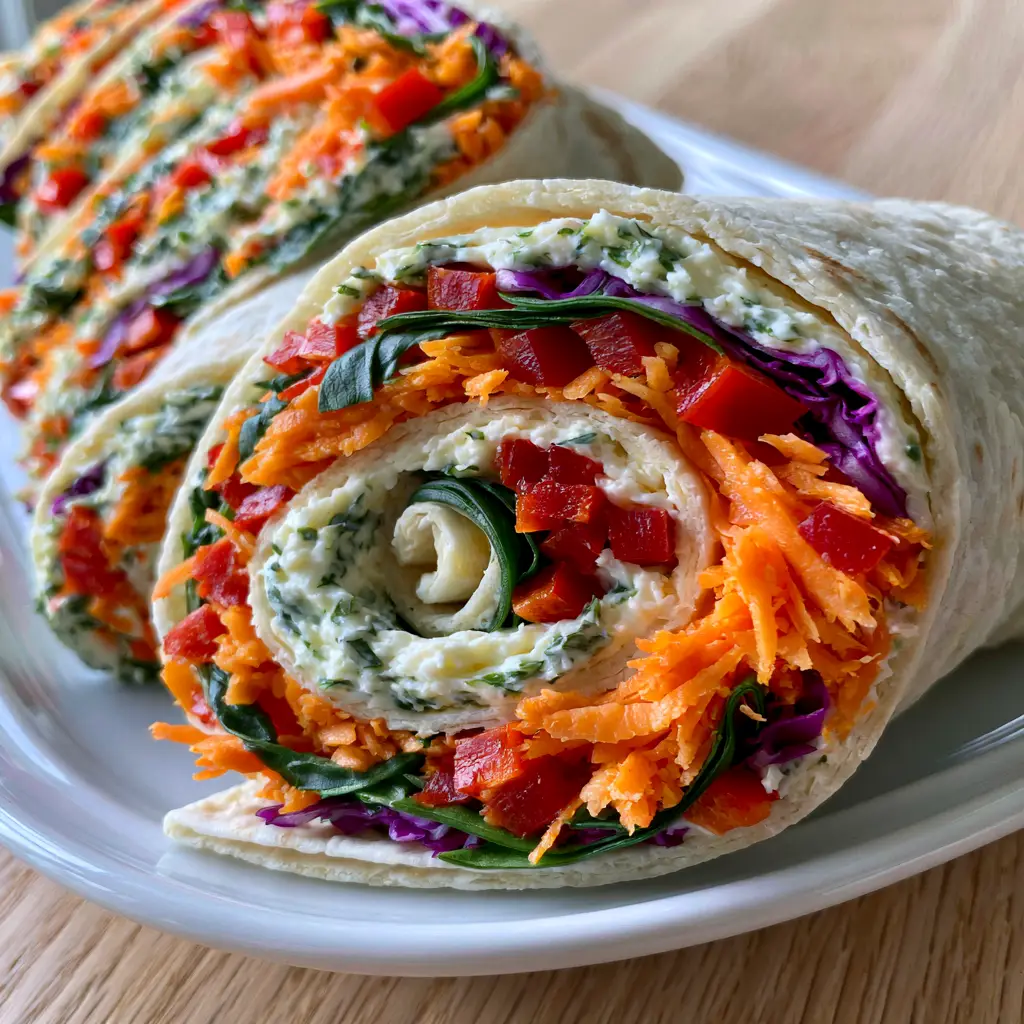
Vegetable Tortilla Roll Ups are the quintessential solution for anyone seeking a refreshing, crisp, and visually stunning appetizer that requires absolutely zero time over a hot stove. Imagine a bite that combines the creamy richness of herb-flecked cheese with the snap of garden-fresh vegetables, all encased in a soft, pillowy flour tortilla. These spirals aren’t just food; they are a mosaic of color, featuring ruby red peppers, emerald spinach, and royal purple cabbage that look as good as they taste.
Whether you are preparing a light lunch for a sunny patio gathering or looking for a reliable snack that children will actually enjoy, these roll-ups deliver on every front. The key to their success lies in the structural integrity of the tight spiral and the “zesty” punch of the cream cheese spread. In this guide, we will explore the culinary forensics of creating the perfect wrap that stays firm, avoids the dreaded sogginess, and highlights the natural morning-light glow of fresh produce.
Why You Will Crave These Colorful Rainbow Spirals
- Textural Masterclass: The contrast between the velvety whipped cream cheese and the “crisp and chilled” raw vegetables provides a satisfying sensory experience in every mouthful.
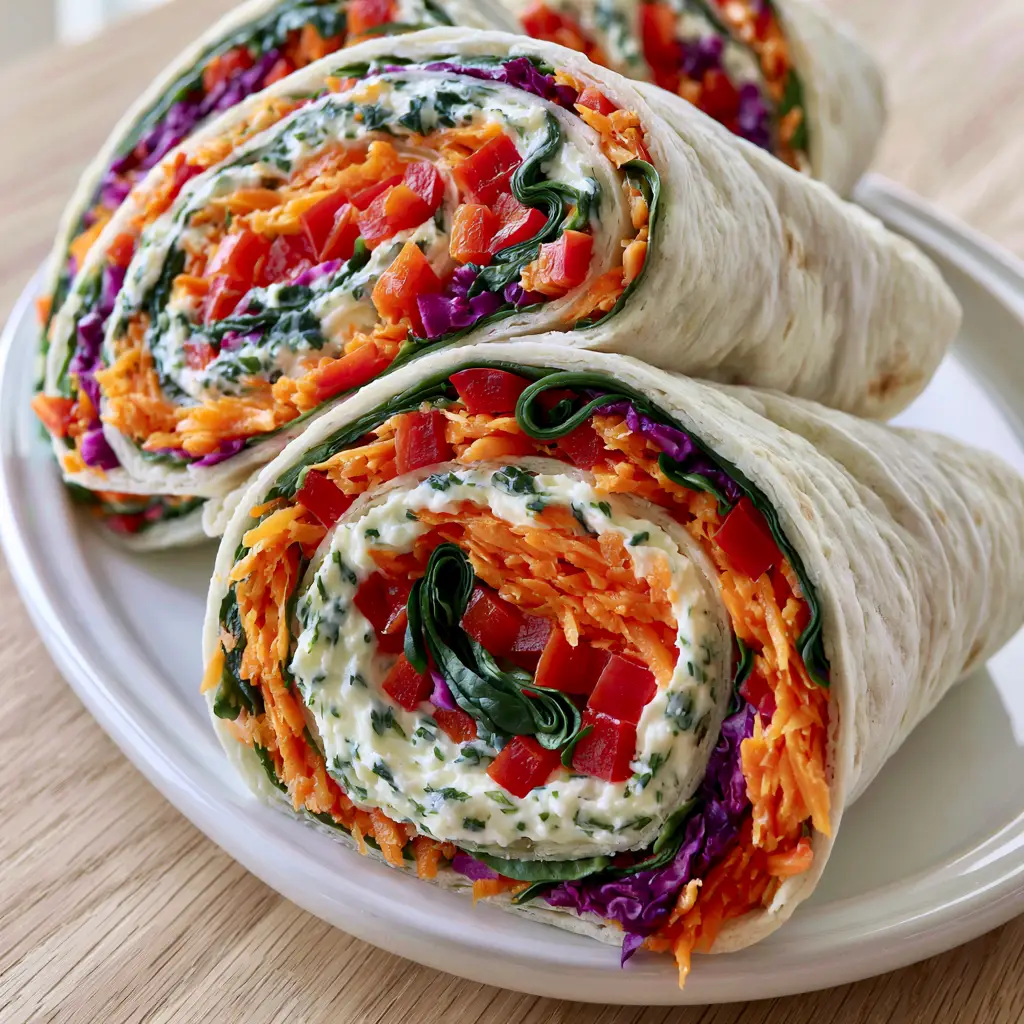
- Visual Showstopper: With a sharp cross-section revealing dense, colorful layers of orange, red, green, and purple, these roll-ups are designed to be the centerpiece of a white ceramic plate.
- Make-Ahead Magic: These actually benefit from a rest in the refrigerator, allowing the flavors to meld and the tortilla to soften slightly, making them perfect for stress-free hosting.
- Nutrient-Dense Satisfaction: Packed with raw carrots, spinach, and cabbage, you are getting a significant serving of vitamins while enjoying a handheld treat.
The Anatomy of the Perfect Zesty Vegetable Filling
To achieve the “vibrant stack” described in our visual blueprint, we must select ingredients that offer both structural support and high-impact flavor. Every component serves a specific culinary purpose, ensuring the final result isn’t just a wrap, but a professional-grade hors d’oeuvre.
Large Flour Tortillas: Use 10-inch (25cm) tortillas. These provide the necessary surface area to create multiple rotations, resulting in the “tight, perfect spirals” that define a high-quality roll-up.
Whipped Cream Cheese: You will need 8 oz (225g) of full-fat cream cheese. Full-fat versions provide the structural “glue” required to hold the dense layers of vegetables together without leaking or sliding.
The Zesty Element: To transform plain cheese into a “zesty white spread,” we incorporate 1 tsp (5ml) of fresh lemon juice and 1/2 tsp (2.5g) of garlic powder. This acidity cuts through the fat and brightens the overall flavor profile.
Dried Herb Flecks: A blend of 1 tbsp (4g) dried parsley and chives adds the “green herbs” visible in the cream cheese layer. These herbs provide an earthy undertone that complements the fresh vegetables.
Shredded Raw Carrots: 1 cup (110g) of finely shredded carrots adds a pop of bright orange and a natural sweetness. Shredding them finely is crucial for a tight roll.
Finely Diced Red Bell Peppers: 1/2 cup (75g) of ruby red peppers offers a juicy crunch. Dicing them small prevents them from poking through the tortilla skin.
Thin-Sliced Fresh Baby Spinach: 1 cup (30g) of dark green spinach ribbons provides a foundational earthy flavor. Slicing them into ribbons (chiffonade) ensures they lay flat.
Shredded Purple Cabbage: 1/2 cup (50g) of cabbage provides the “pops of purple” and a robust, peppery crunch that holds up well against the moisture of the cheese.
Chopped Green Onions: 1/4 cup (25g) of scallions adds a mild Allium bite. Use both the white and green parts for maximum flavor distribution.
Essential Tools for Precision Slicing and Rolling
Achieving the “sharp close-up” quality of professional food photography requires the right equipment. You cannot achieve tight spirals with dull tools or improper surfaces.
First, a high-quality mandoline or box grater is essential for the carrots and cabbage. The thinner the vegetable strands, the denser you can pack the layers. A sharp chef’s knife is non-negotiable for the final slicing; a dull blade will squash the tortilla and cause the cream cheese to ooze out of the sides.
You will also need plastic wrap. This is the “invisible” tool that allows the rolls to set in the fridge. By wrapping the logs tightly, you compress the ingredients, ensuring that when you slice them, the spirals remain intact and the cross-section looks like a work of art.
Step-by-Step Guide to Crafting Vegetable Tortilla Roll Ups
Phase 1: Preparing the Zesty Herb Spread
In a medium mixing bowl, combine your softened cream cheese, lemon juice, garlic powder, and dried herbs. Use a whisk or a hand mixer to whip the mixture until it is light and airy. This aeration makes the spread easier to apply to the delicate flour tortillas without tearing them.
Taste the mixture. It should be tangier than standard cream cheese. If you prefer more “zest,” add a pinch of lemon zest. Ensure the dried herbs are evenly distributed so that every “green herb fleck” is visible in the final spiral.
Phase 2: The Art of the Vegetable Layer
Lay your flour tortilla flat on a clean work surface. Spread a generous, even layer of the cream cheese mixture across the entire surface, leaving only a 1/2 inch (1.25cm) border at the very top. This border will act as the final seal.
Begin layering your vegetables in horizontal rows. Start with the spinach ribbons at the bottom, followed by the shredded carrots, the diced red peppers, the purple cabbage, and finally the green onions. By layering them systematically rather than tossing them together, you ensure that the cross-section reveals distinct, vibrant rings of color.
Phase 3: Rolling and Chilling for Structural Integrity
Starting from the bottom edge (the side with the spinach), roll the tortilla upward as tightly as possible. Use your fingers to tuck the vegetables in as you go. The goal is a firm, cigar-like log. Once reached the top, the plain cream cheese border will “glue” the roll shut.
Wrap each log tightly in plastic wrap, twisting the ends like a candy wrapper. Place the logs in the refrigerator for at least 2 hours. This chilling process is vital; it firms up the cream cheese, which acts as the mortar between the vegetable “bricks,” allowing for those clean, sharp cuts later.
Phase 4: Slicing the Perfect Spirals
Remove the logs from the fridge and discard the plastic wrap. Using a very sharp serrated knife or a chef’s knife, trim off the uneven ends (the “cook’s treat”). Slice the remaining log into 1-inch (2.5cm) rounds.
For the best presentation, wipe your knife blade with a damp cloth between every single cut. This prevents the white cream cheese from smearing over the colorful vegetable layers, keeping the “ruby red” and “dark green” colors distinct and sharp for your guests.
Expert Tips for Appetizer Success
- Moisture Control: If your red peppers are particularly juicy, pat them dry with a paper towel after dicing. Excess moisture is the primary enemy of a crisp tortilla.
- Room Temperature Tortillas: Cold tortillas are brittle and will crack when you try to roll them. If yours are coming from the fridge, microwave them for 10 seconds to make them pliable.
- Double the Spread: If you find your vegetables are falling out, you may need a thicker layer of cream cheese. It acts as the structural adhesive for the entire recipe.
- Color Balance: To get that “vibrant natural color” look, ensure your purple cabbage is sliced very thinly so it doesn’t overpower the delicate spinach ribbons.
Storage and Freshness Guidelines
These Vegetable Tortilla Roll Ups are best enjoyed within 4 to 6 hours of slicing to maintain the maximum “crisp and chilled” texture. However, you can store the unsliced logs in the refrigerator for up to 24 hours.
We do not recommend freezing this recipe. The high water content in the raw carrots, peppers, and cabbage will cause the cell walls to burst upon thawing, resulting in a watery, unappealing mess. For the best experience, keep them in an airtight container in the coldest part of your refrigerator until the moment you are ready to plate them on your white ceramic dish.
What to Serve With Your Vegetable Spirals
These roll-ups are a fantastic standalone snack, but they also shine as part of a larger spread. If you are hosting a summer luncheon, pair them with a fresh summer garden pasta for a complete vegetarian feast. The textures of the pasta and the crunch of the roll-ups complement each other beautifully.
For a heartier meal, serve these spirals alongside a creamy pasta salad or a bowl of hearty lentil and potato soup. If you want to lean into a festive theme, a side of smoky grilled corn provides a wonderful warm contrast to the chilled wraps. Finally, for an upscale appetizer board, place them next to some fresh tomato bruschetta to offer your guests a variety of garden-fresh flavors.
Frequently Asked Questions
As written, they use flour tortillas which contain gluten. To make them gluten-free, simply swap the flour tortillas for your favorite large gluten-free tortilla brand, ensuring they are warmed slightly to prevent cracking.
Yes! You can roll the logs and keep them wrapped in plastic wrap in the fridge overnight. For the best visual appeal, slice them just before serving so the vegetable colors remain bright and the edges sharp.
While you can use low-fat cream cheese, it is often softer and contains more moisture, which may lead to a less stable roll and a soggier tortilla. Full-fat or Neufchâtel cheese is recommended for the best structural integrity.
To prevent sogginess, always pat your vegetables dry after washing and dicing. Additionally, use full-fat cream cheese as it has a lower water content, creating a more effective moisture barrier against the tortilla.
Use a very sharp serrated knife or a chef’s knife. Wipe the blade with a clean, damp cloth between every slice to remove cream cheese residue, ensuring the colorful vegetable layers stay distinct.
The Ultimate Vegetable Tortilla Roll Ups Recipe
Vegetable Tortilla Roll Ups: The Ultimate Vibrant and Crunchy Party Appetizer
Ingredients
Equipment
Method
- In a bowl, combine cream cheese, lemon juice, garlic powder, and dried herbs. Whip until airy and flecked with herbs.
- Spread the cream cheese evenly over tortillas. Layer spinach, carrots, peppers, cabbage, and onions in horizontal rows.
- Starting from the bottom, roll the tortilla tightly into a log, ensuring the cream cheese border seals the edge.
- Wrap logs in plastic wrap and refrigerate for at least 2 hours to allow the structure to firm up.
- Use a sharp knife to slice the logs into 1-inch (2.5cm) rounds, revealing the vibrant cross-section spirals.
Notes
Always use a sharp, clean knife for slicing to prevent smearing the cream cheese.

Closing & Call to Action
Mastering the Vegetable Tortilla Roll Ups is a rite of passage for any home cook who loves entertaining. With their vibrant colors, zesty herb filling, and satisfying crunch, they are guaranteed to disappear from the plate in minutes. The “tight spirals” and “dense layers” make them a professional-looking addition to any menu without the professional-level stress.
Did you try this recipe? We would love to see your vibrant stacks! Leave a comment below with your favorite vegetable additions, and don’t forget to share your creations and pin this recipe to Pinterest so you always have it on hand for your next gathering.