There is a specific kind of magic that happens when you realize a gourmet, artisan-style pizza doesn’t require a 24-hour fermentation or a degree in Italian pastry arts. This easy pizza recipe is designed for the hungry, the impatient, and the enthusiast who craves that iconic, handheld smartphone-ready cheese stretch without the wait. Imagine a crust that is thin, hand-pressed, and dusted with flour, topped with a vibrant, herb-flecked sauce and a bubbling layer of blistered mozzarella.
The beauty of this 10-minute no-yeast method lies in its accessibility. We are bypassing the rising time entirely, utilizing chemical leaveners to achieve a tender yet crispy base that stands up to a heavy layer of melted provolone and mozzarella. If you have ever stared at a delivery app only to be discouraged by the 45-minute wait and the cold crust, this recipe is your ultimate weeknight solution.
Every element of this dish is a sensory experience, from the sound of the knife slicing through the charred, golden-brown edges to the visual of the steam rising from the torn fresh basil leaves. This isn’t just a quick meal; it is a masterclass in achieving professional textures in a fraction of the time usually required for traditional pizza making.
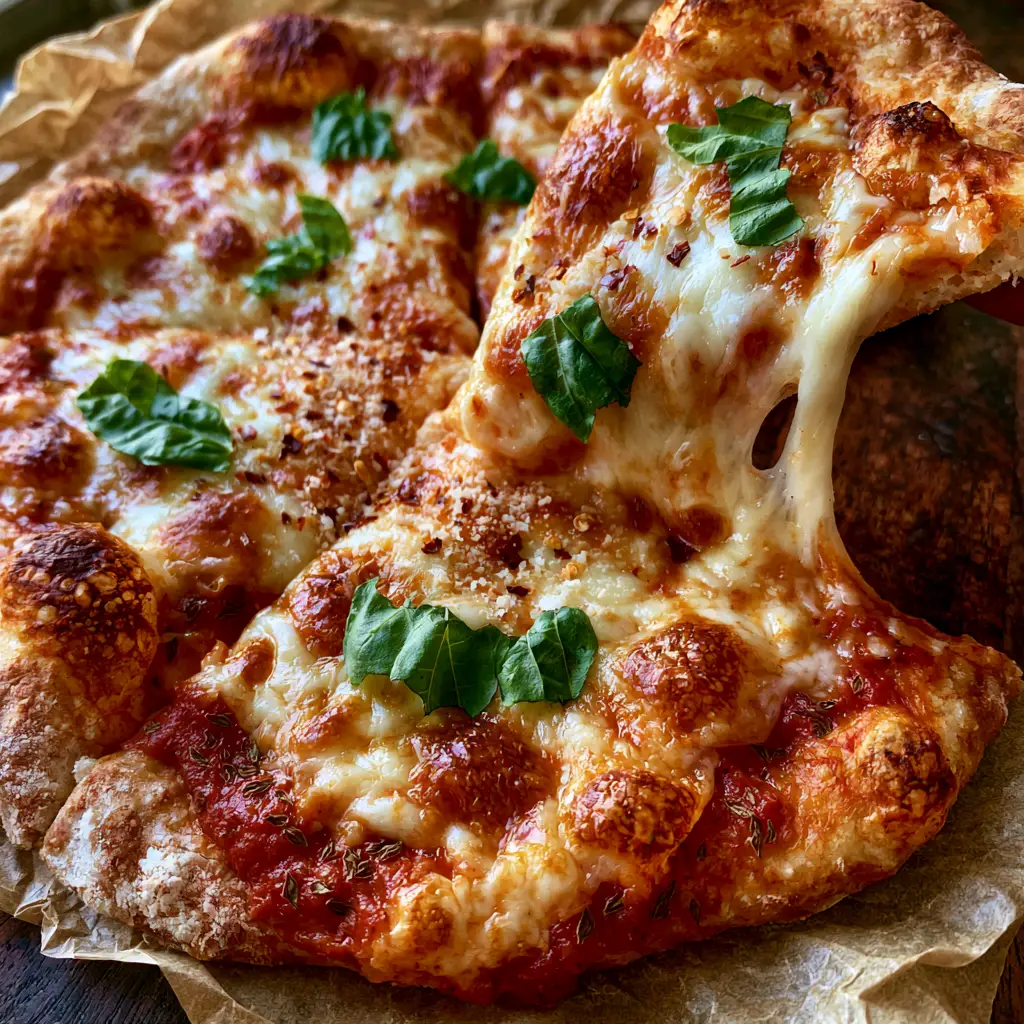
The Anatomy of the Perfect 10-Minute No-Yeast Pizza
- Hand-Pressed Thin Crust: We skip the rolling pin to maintain those beautiful, irregular charred bubbles and a rustic, artisan feel.
- Dramatic Cheese Stretch: By blending high-moisture mozzarella with sharp provolone, we achieve that thick, stringy pull seen in the most decadent food photography.
- Blistered Perfection: High-heat baking ensures the cheese develops those signature golden-brown spots while the edges of the dough take on a toasted, flour-dusted finish.
- Herb-Flecked Depth: The sauce isn’t just a base; it’s a vibrant red layer infused with dried oregano and topped with fresh, bright green torn basil for a multi-dimensional flavor profile.
Essential Components for an Unforgettable Easy Pizza Recipe
All-Purpose Flour (plus extra for dusting): 2 cups (250g). This provides the structural foundation; using all-purpose ensures the crust remains tender enough to chew but strong enough to hold heavy toppings.
Baking Powder: 1.5 tsp (7g). Since we aren’t using yeast, this chemical leavener provides the “lift” needed to create those small, airy bubbles in the crust during the high-heat bake.
Greek Yogurt or Whole Milk: 1 cup (245g). The acidity in yogurt reacts with the baking powder for a better rise, while the fat content ensures the dough doesn’t turn into a cracker.
Thick Herb-Flecked Tomato Sauce: 3/4 cup (180ml). Look for a rich, concentrated tomato paste-based sauce or a reduced marinara to ensure the thin crust doesn’t become soggy.
Low-Moisture, Part-Skim Mozzarella & Provolone Blend: 2 cups (225g). Freshly grating your cheese is the secret to the ultimate melt; pre-shredded varieties are coated in potato starch which prevents that dramatic cheese stretch.
Fresh Basil Leaves: 5-6 leaves. Torn by hand just before serving, these release essential oils that provide a floral, peppery contrast to the rich, salty cheese.
Red Pepper Flakes and Grated Parmesan: 1 tbsp (approx). These finishing touches provide a subtle heat and a sharp, umami-rich “dust” that clings to the melted cheese spots.
The Pro-Tool Kit for Artisan Results
To achieve the visual cues of this easy pizza recipe, you don’t need a wood-fired oven, but a few specific tools will help. A heavy-duty baking sheet or a preheated pizza stone is essential for creating those charred bubbles on the bottom of the crust. Crumpled brown parchment paper is your best friend here—it prevents sticking and adds to the rustic, “handheld smartphone photo” aesthetic we are aiming for.
A high-quality pizza rocker or a very sharp chef’s knife is also vital. You want to slice through the blistered cheese in one clean motion to preserve the integrity of the crust and set up that perfect, stringy cheese pull. If you’re looking for more comforting Italian-inspired meals, our best lasagna recipe also utilizes this high-heat cheese blistering technique for maximum flavor.
Mastering the 10-Minute No-Yeast Dough Technique
Step 1: Constructing the Rustic Dough Base
In a large mixing bowl, whisk together your flour, baking powder, and a generous pinch of sea salt. Slowly fold in the Greek yogurt or milk using a sturdy spatula until a shaggy mass forms. Turn the dough out onto a clean, flour-dusted surface. Knead the dough for about 2 minutes; you are looking for it to become smooth and slightly elastic, but it should still feel soft to the touch.
Step 2: The Hand-Pressed Shaping Method
Divide the dough into two equal portions for thin-crust pizzas. Instead of reaching for the rolling pin, use the balls of your hands to press the dough outward from the center. This creates the “hand-pressed” look with slightly thicker, flour-dusted edges that will puff up and char in the oven. Aim for a thickness of about 1/8 inch (3mm) in the center to ensure the crust stays crispy under the sauce.
Step 3: Layering the Herb-Flecked Sauce and Cheese
Spread a thick layer of the herb-flecked tomato sauce across the dough, leaving a 1/2 inch (1cm) border for the crust. Generously pile on your mozzarella and provolone blend. Ensure the cheese reaches right to the edge of the sauce to create those beautiful “blistered cheese spots” where the dairy caramelizes against the heat of the pan. Sprinkle with a pinch of dried oregano for that vibrant, rich red visual.
Step 4: The High-Heat Bake for Maximum Char
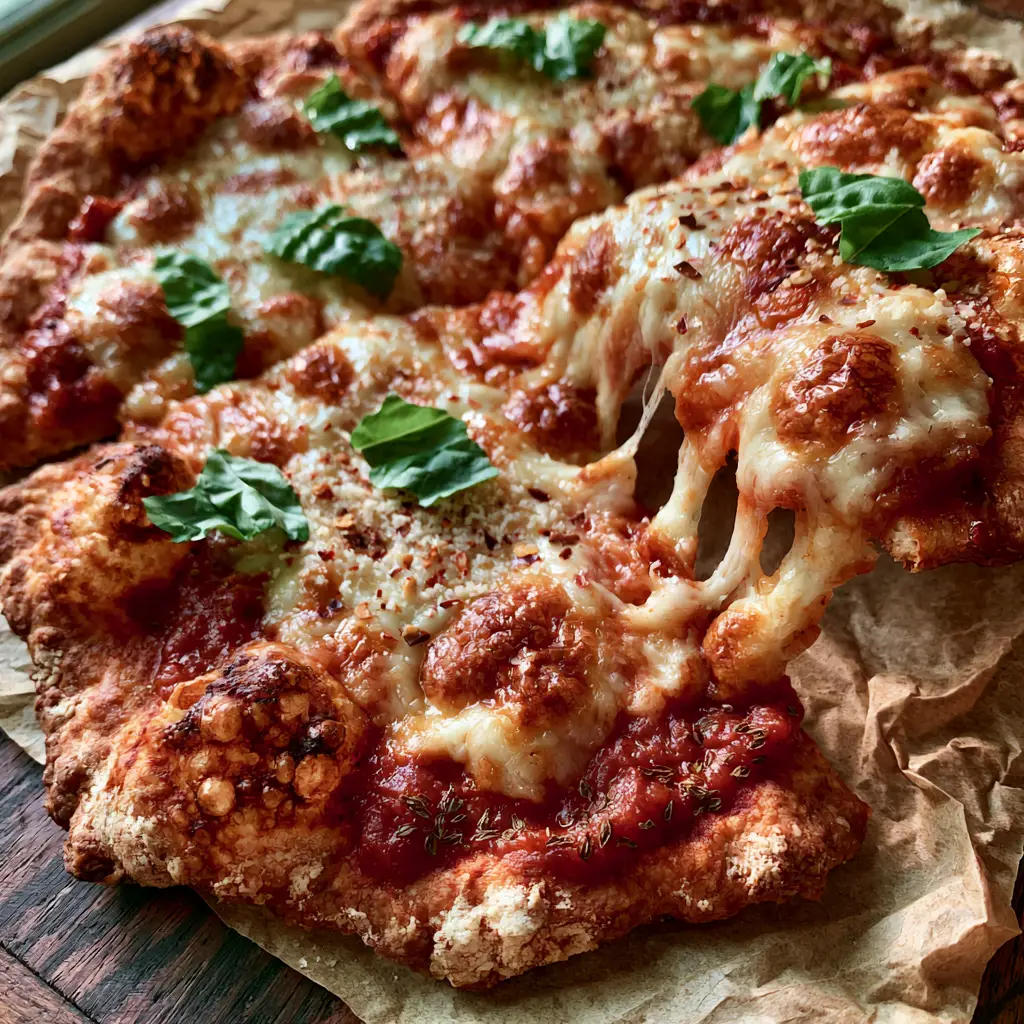
Slide your pizza (on the parchment paper) onto your preheated baking surface at 475°F (245°C). Bake for 8-10 minutes. Watch for the visual cues: the edges of the dough should turn golden-brown with dark charred bubbles, and the cheese should be bubbling vigorously with deep brown spots. This high temperature is the only way to achieve the professional “blistered” look in a home kitchen.
Expert Tips for the Ultimate Cheese Stretch
- The Temperature Secret: Ensure your cheese is cold when it goes into the oven. Cold cheese takes longer to break down, allowing the crust to crisp up while the cheese retains its elasticity for that stringy stretch.
- Avoid Over-Mixing: When working with no-yeast dough, over-kneading can lead to a tough, rubbery texture. Stop as soon as the dough is cohesive.
- The Flour Dusting: Don’t be afraid of “raw” flour on the edges. That light coating of flour is what gives the pizza its rustic, artisan appearance and prevents the dough from sticking to the parchment.
- The Resting Period: Let the pizza sit for exactly 60 seconds after it comes out of the oven. This allows the cheese to “set” slightly, which actually improves the quality of the long, stringy pull when you lift a slice.
Creative Pairings for Your Pizza Night
This easy pizza recipe is a star on its own, but it also pairs beautifully with other vibrant dishes. If you are leaning into a Mediterranean theme, try serving this alongside a crisp salad or even a warm bowl of Italian chicken soup for a “soup and slice” combo that beats any restaurant deal. For those who love a bit of fusion, the acidity in our restaurant-style salsa recipe surprisingly complements the rich fats of the mozzarella and provolone blend.
If you have leftover ingredients like bell peppers or onions, they can easily be tossed into a vegetable soup the next day, ensuring nothing from your pizza prep goes to waste. The goal is a balanced meal that highlights the textures of the charred crust and the fresh, bright green basil garnish.
Safe Storage and Reheating for Residual Crispness
While this pizza is best enjoyed immediately for that “dramatic cheese stretch,” you can store leftovers in an airtight container in the refrigerator for up to 3 days. To maintain the “thin crust” integrity, avoid the microwave. Instead, reheat slices in a dry skillet over medium heat for 3-4 minutes. This recrisps the bottom of the crust and remelts the cheese without making the dough soggy.
For freezing, par-bake the hand-pressed dough for 4 minutes before adding toppings. Once cooled, wrap tightly in plastic wrap and foil. It will stay fresh for up to 2 months, providing an even faster “easy pizza recipe” option for busy nights.
Frequently Asked Questions
Because this is a thin, hand-pressed crust, avoid ‘heavy’ or watery toppings like fresh tomatoes or raw mushrooms, which can lead to a soggy center.
Yes! You can substitute the yogurt with whole milk and a teaspoon of lemon juice or white vinegar to provide the acidity needed to react with the baking powder.
Preheat your baking sheet or pizza stone at 475°F (245°C) for at least 20 minutes before sliding the pizza on. The residual heat creates the charred bubbles and crisp base.
A blend of low-moisture, part-skim mozzarella and provolone is the gold standard. Always grate it fresh from the block to avoid anti-clumping starches that ruin the stretch.
Toughness is usually caused by over-kneading. For a no-yeast dough, you only need to knead until the ingredients are just combined and smooth, about 2 minutes.
The Ultimate 10-Minute No-Yeast Pizza Recipe
Easy Pizza Recipe: 10-Minute No-Yeast Thin Crust with Dramatic Cheese Stretch
Ingredients
Equipment
Method
- Whisk flour, baking powder, and salt. Fold in yogurt or milk until a shaggy dough forms.
- Knead on a flour-dusted surface for 2 minutes until smooth and elastic.
- Divide dough and hand-press into thin rounds. Leave the edges slightly thicker for charring.
- Spread herb-flecked sauce and top with the cheese blend, reaching the edges for blistered spots.
- Bake at 475°F (245°C) for 8-10 minutes until edges are charred and cheese is bubbly and brown.
- Top with torn basil, red pepper flakes, and parmesan before slicing.
Notes
Don't over-knead the no-yeast dough to keep it tender.
Join the Hearth Gourmet Community!
This easy pizza recipe is a testament to the fact that great food doesn’t have to be complicated. We hope you enjoy the “dramatic cheese stretch” and the rustic, charred edges as much as we do. If you made this, please leave a comment below and let us know how your crust turned out! Don’t forget to snap a photo of your blistered cheese spots and share it with us by pinning this recipe to your favorite boards on Pinterest. For more quick and delicious dinner inspiration, sign up for our newsletter today!